List of Steps in Order:
1: Create your variables in Botpress
2: Paste code block template
3: Final touches on StackAI
4: Fill in StackAI code
5: Add Text block
6: Testing
Create Your Variables in Botpress
To successfully create this integration, you will need to create 2 variables in Botpress. We will do that now to get it out of the way.
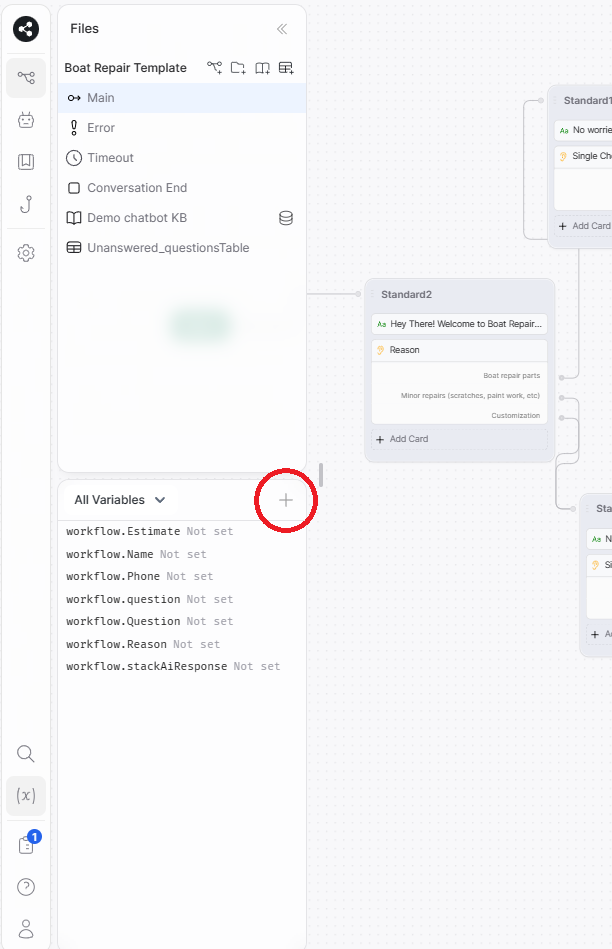
When inside the Botpress Studio, the left side of the screen will show all of your current variables (or no variables if you don’t have any).
To create a new variable, simply hit the plus sign next to the “All Variables” text.

The only thing you need to change is the name. In this example, we use “stackAiResponse” You can use this as well, or create your own custom name. Click “Add” once finished.
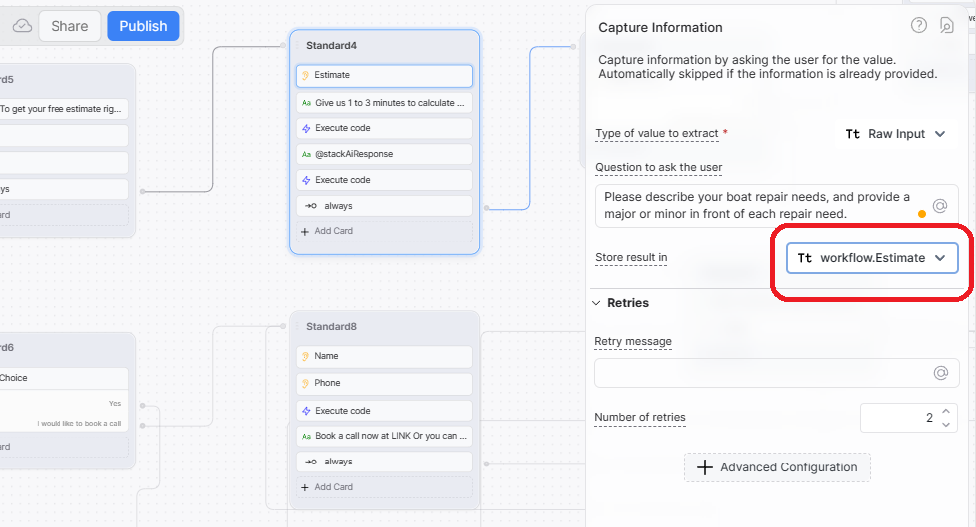
Next, we need to create the variable for the question we ask in Botpress. It is a good idea to save all of your questions as variables, but if you haven’t done so yet, click on the question node, and under the text on the right side of the screen will show “Select/Create Variable”
Click “Select/Create Variable” then set the variable name you desire, and then press Enter. To know if you did it right, that box that used to say “Select/Create Variable” will now say “workflow.(Variable name)”

Paste Code Block Template
Under the question block we just set a variable for, add an “Execute Code” block

Copy and paste the code snippet provided here https://textdoc.co/8RPantrD70cSke59
There are 4 elements of this code that we must change, we can change 2 of them right now.
Under “Const data” it shows “workflow.ESTIMATE”. Replace ESTIMATE with whatever variable name you created for the question block. Caps and spaces must be exact.
Underneath that, there is text that shows “workflow.STACKAIRESPONSE”. Replace STACKAIRESPONSE with whatever variable name you created earlier (don’t use the question variable)
Final touches on StackAI
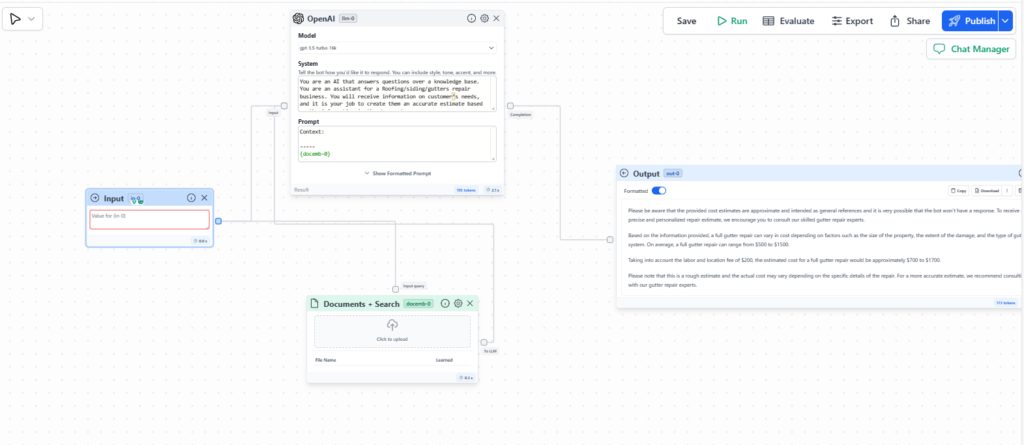
Next, head over to the StackAI QnA bot that you have created.
Apply any finishing touches on the system or knowledge base, don’t worry about being perfect, you can always change this later, and it will automatically update on your finished chatbot
Once finished, empty your “In-0” box, there should be a red outline once you do that.

Then Save and Publish your QnA bot.
Fill in StackAI Code
Click on “Export” inside your StackAI bot, and then head over to the “API end-point” tab
Under the Python tab, you will see some code that looks similar to the code we already uploaded into Botpress.
Copy the API_URL in StackAI and paste it into the Botpress code where it says “STACK AI LINK” (Leave the “” at the ends of the link)
For security purposes, click on “Show Token” in StackAI, then copy the text that follows “Bearer”
Paste that code over all the X’s in the Botpress code
Add Text Block
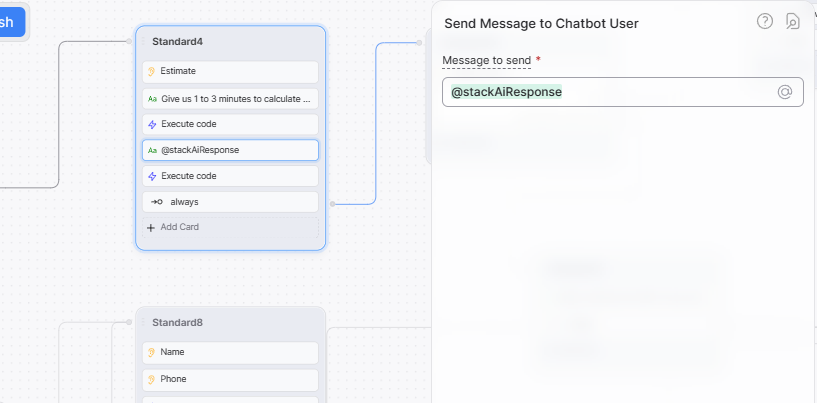
Now in Botpress, add a text block underneath the execute code block that we have been editing
In this text block, we will be referencing the variable we created earlier. To do that, simply type @stackAiRepsonse (if you used a different name, then type that there instead)

Testing
That is the setup complete! Now all we have to do is test to make sure everything is set up properly.
Before we start, make sure to close out of StackAI first. We have had problems in the past trying to test while it’s open.
Back in Botpress, Publish your bot from within the studio (towards the top of the screen). Next to Publish, hit Share.
This is a shareable link that you can give to anyone to mess around with the chatbot while in the testing phase. Follow your chatbot’s path once you get to your question, and see if the bot responds.
Start with asking a question that you know is in the knowledge base, otherwise, if you get an error, you won’t know for sure if it was from the StackAI configuration or from your knowledge base.
All the previous information is explained in a recent YouTube video of ours, and you can check it out here: https://www.youtube.com/watch?v=jo__32eniSU&t=74s
Share this post: on Twitter on Facebook on Google+

